|
|
Step 1. Get your project (ASP.NET MVC, full .NET framework) ready (load or create it).
 Step 2
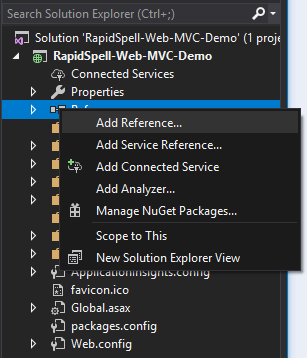
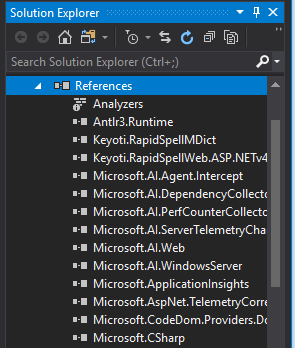
Step 2. Reference the appropriate DLLs for .NET
- Keyoti.RapidSpellWeb.ASP.NETv4.dll and Keyoti.RapidSpellMDict.dll
which you can find under your install dir, eg.
C:\Program Files (x86)\Keyoti Inc\RapidSpell Web .NET v6\NETCLR_v4_BIN
 Step 3
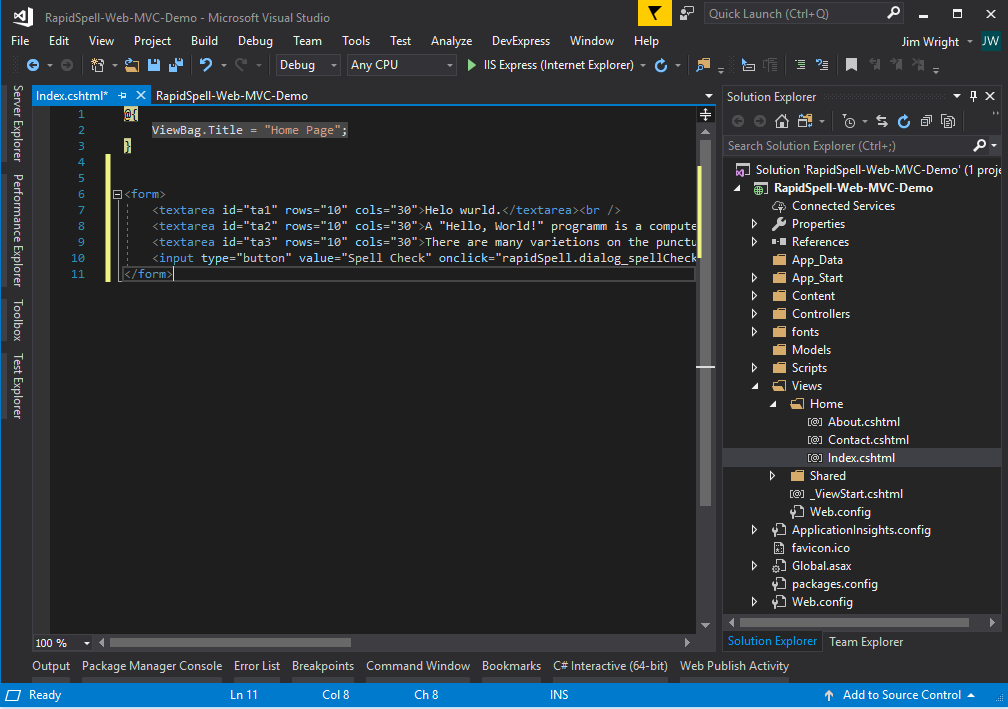
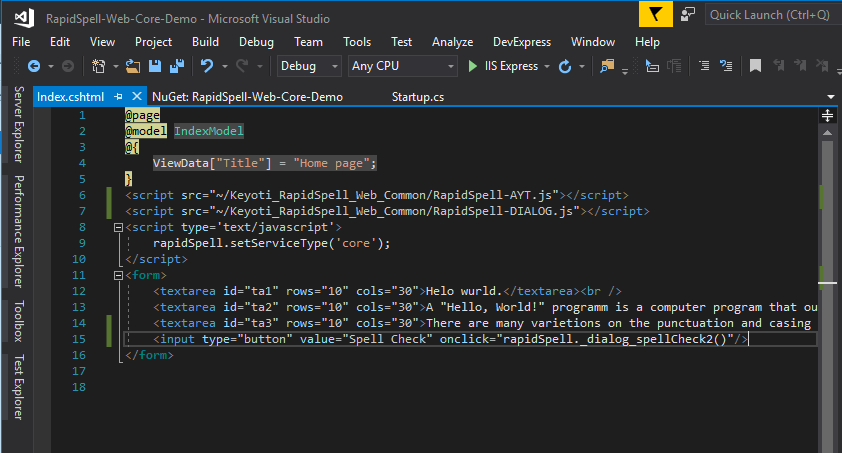
Step 3. Add textareas to your page, they must have 'id' attributes, and the dialog checker requires them to be in a form.
<form>
    <textarea id="ta1" rows="10" cols="30">Helo wurld.</textarea><br />
    <textarea id="ta2" rows="10" cols="30"></textarea><br />
    <textarea id="ta3" rows="10" cols="30"></textarea><br />
    <input type="button" value="Spell Check" onclick="rapidSpell.dialog_spellCheck()"/>
</form>
Step 4
Step 4. Add the client files to a folder under the user web application:
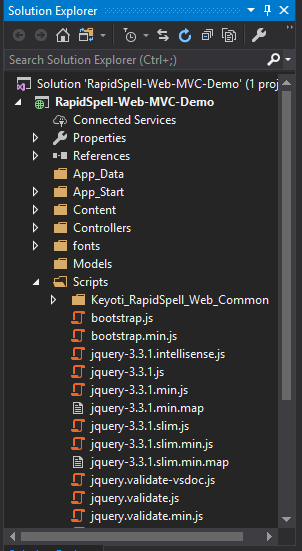
Find the Keyoti_RapidSpell_Web_Common folder under the install dir (eg. C:\Program Files (x86)\Keyoti Inc\RapidSpell Web .NET v6\Keyoti_RapidSpell_Web_Common) and drag it into the scripts folder in the project.
 Step 5
Step 5. Add the 'script src' tag to the page:
-
To automatically add the script tag, drag RapidSpell-AYT.js from the Solution Explorer on to the page source, and repeat with RapidSpell-DIALOG.js. This will add the script tags to the page with the correct path. You can deliver the scripts to the page however you like, this example is for simplicity.
	<script src="~/Scripts/Keyoti_RapidSpell_Web_Common/RapidSpell-AYT.js"></script>
	<script src="~/Scripts/Keyoti_RapidSpell_Web_Common/RapidSpell-DIALOG.js"></script>
-
Activate WCF based AJAX, and for dialog use DIV dialog.
	<script type="text/javascript">
		rapidSpell.useAJAXWebService = true;
		rapidSpell.dialog_setUseDivDialog(true);  //only call if including RapidSpell-DIALOG.js
	</script>
-
If your project uses jQuery v3+, but does not include jQuery UI (as with newer Visual Studio project templates), then you must add the following code AFTER the jQuery file is included.
For example, add the bold section to your _layout.cshtml after script bundles are rendered:
    @Scripts.Render("~/bundles/jquery")
    @Scripts.Render("~/bundles/bootstrap")
    @RenderSection("scripts", required: false)

    <link rel="stylesheet" href="https://cdnjs.cloudflare.com/ajax/libs/jqueryui/1.12.1/jquery-ui.css" />
    <link rel="stylesheet" href="https://cdnjs.cloudflare.com/ajax/libs/jqueryui/1.12.1/jquery-ui.structure.min.css" />
    <script src="//code.jquery.com/ui/1.12.1/jquery-ui.min.js"></script>

</body>
</html>
-
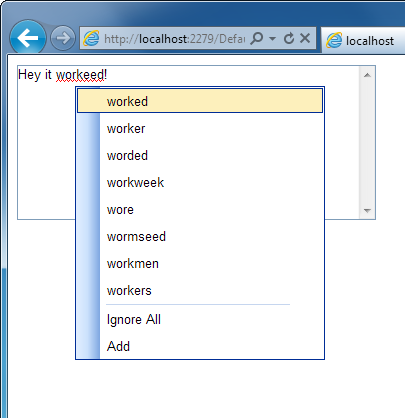
Add a button to launch the dialog spell check.
<input type="button" value="Spell Check" onclick="rapidSpell.dialog_spellCheck()"/>
Step 6
Step 6. Possibly required changes.
-
Depending on your project, you may or may not need to add ignore routes, to allow requests to the RapidSpell SVC file to succeed.
In the MVC project's RouteConfig class, add 2 ignore routes:
routes.IgnoreRoute("{d}/{resource}.svc/{*pathInfo}");
routes.IgnoreRoute("{d}/{resource}.svc");
-
If your project uses jQuery v3+ but does not include jQuery UI, then you will need to include jQuery UI in order to use the dialog spell checker, eg.
<link rel="stylesheet" href="https://cdnjs.cloudflare.com/ajax/libs/jqueryui/1.12.1/jquery-ui.css" />
<link rel="stylesheet" href="https://cdnjs.cloudflare.com/ajax/libs/jqueryui/1.12.1/jquery-ui.structure.min.css" />
<script src="//code.jquery.com/ui/1.12.1/jquery-ui.min.js"></script>
Ensure this is added after the core jQuery JS file is included.
Note: To disable spell check on specific text boxes add the attribute nospell="true" to the text box.
Note: To remove the 'Add' option set the dictionary path to an empty string; rapidSpell.setParameterValue('default', 'UserDictionaryFile', '');
|